Quick Answer
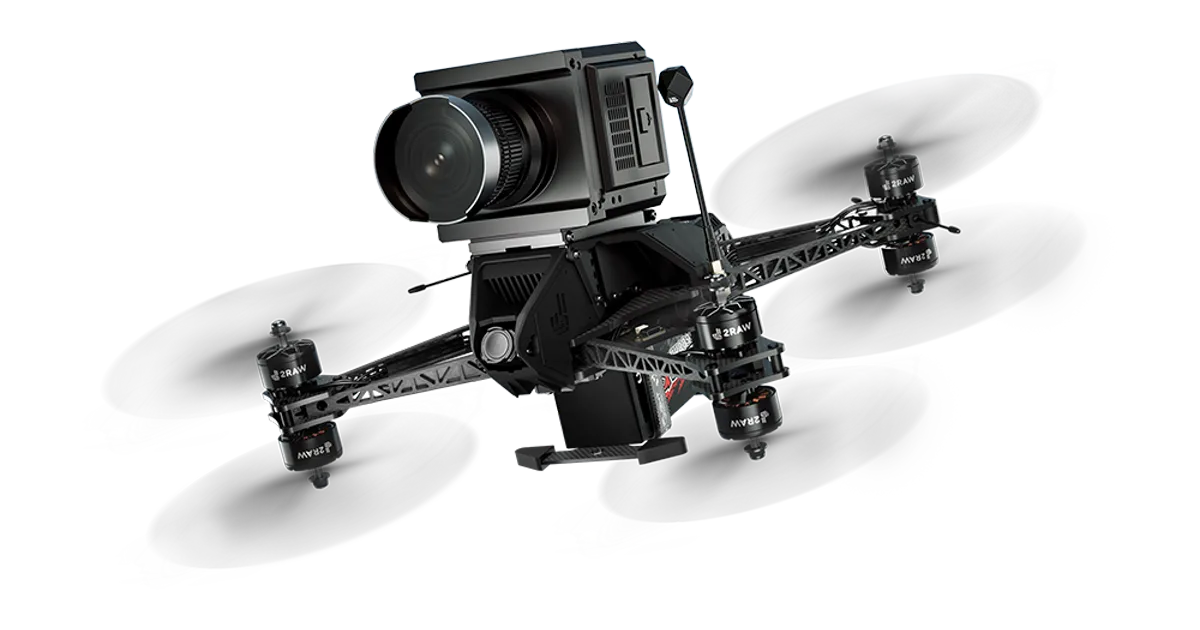
A cinelifter is a large FPV drone built to carry a heavy camera, such as a mirrorless or cinema camera, while a pilot flies it manually for close, dynamic shots. A good build starts with an X8 or octo frame sized for your payload, motors and props chosen with real thrust headroom, a battery sized for both weight and flight time, and a vibration-isolated camera mount. Plan for a slower, more careful build process than a normal freestyle quad.
What Makes a Cinelifter Different
A normal freestyle or racing quad is built to be light and fast. A cinelifter flips that goal. It is built to lift a real camera, often 1 to 3 kilograms once you include the lens, gimbal and cage, while still flying smoothly enough for usable footage.
This changes almost every part choice. You need more motors, bigger props, a stronger frame, and a battery setup that can supply real current under load without sagging hard. You also need enough spare thrust so the drone still flies safely if one motor or ESC fails during a shot.
Frame Layout: X8 vs Octo
Two layouts are common for cinelifters.
X8 uses four arms with two motors stacked on each arm, one facing up and one down. This layout keeps the frame compact and is easier to fit into tighter spaces on a film set.
Octo (true octocopter) spreads eight motors across eight separate arms. This spacing usually gives cleaner airflow to each prop and can be more efficient than a stacked X8 setup, but the frame itself is larger and heavier.
| Layout | Footprint | Efficiency | Redundancy |
|---|---|---|---|
| X8 | Smaller | Lower (stacked props disturb each other's airflow) | Good |
| Octo | Larger | Higher | Good |
Choose based on your payload target and how much space you will have when flying near people, walls or set pieces.
Sizing Motors and Props for the Payload
Start with your total flying weight: frame, electronics, battery and the full camera rig together. From there, aim for a real thrust-to-weight ratio of at least 2:1 at hover throttle, and higher if you plan aggressive movement. Our guide on motor thrust and torque explains how to read a thrust table and check this math properly instead of guessing.
Bigger props generally move more air per watt than smaller ones, which matters for flight time on a heavy build. Match prop pitch and diameter to your frame's arm length and to the motor's KV rating so the motor stays in an efficient part of its power range rather than being overloaded or underused.
Choosing Motors, ESCs and a Flight Controller Stack
For heavy lift, pick motors with a stator size built for real load, not the smaller motors used on lightweight freestyle builds. Size your ESCs with clear current headroom above your expected draw, since running an ESC near its limit for long periods causes heat problems mid-flight. Our guide on matching motors, ESCs and props walks through this pairing process step by step.
Many cinelifter builders use a separate stack instead of an all-in-one board, because a stack is easier to repair piece by piece after a hard landing with an expensive camera on board. Our comparison of AIO vs stack flight controllers covers the trade-offs for a heavier build like this.
Battery Sizing
Battery choice on a cinelifter is a balance between weight, flight time and how much current you can safely draw. A pack that is too small will sag hard under load and shorten your usable flight time even more than its rated capacity suggests. A pack that is too large adds weight that cuts into your thrust margin.
Work out your expected current draw during hover and during hard maneuvers, then pick a cell count and capacity with real headroom, not just the minimum that meets the number on paper. Our guide to choosing FPV batteries explains capacity, C ratings and weight trade-offs in more detail. Many cinelifter pilots also carry more packs than usual, since flight time per pack drops fast with a heavy payload.
Vibration Isolation for the Camera
Motor and prop vibration is the enemy of clean footage. Even a small amount of high-frequency shake can ruin an otherwise perfect shot. Use a dedicated gimbal designed for aerial use, mounted on soft rubber dampeners sized correctly for the combined weight of the gimbal and camera.
Too-soft dampeners let the camera bounce in low-frequency waves, which looks just as bad as vibration on footage. Too-stiff dampeners pass vibration straight through. Test your isolation setup on the ground with the motors running before your first real flight, and check the footage on a monitor, not just on the small screen in your goggles.
Safety on Film Sets
Flying a heavy drone with an expensive camera around cast, crew and equipment raises the stakes compared to normal recreational flying. A few habits matter more here than anywhere else:
- Always brief the director, camera operator and anyone nearby before a flight, and set a clear no-go zone around the flight path.
- Do a full pre-flight check every time, including prop condition, arm tightness and battery connections, since a heavy drone falling is far more dangerous than a light one.
- Keep a spotter watching the airspace and surroundings while you focus on the shot.
- Plan your route to avoid flying directly over people, even briefly, in case of a failure.
If you are planning a filming project rather than a personal build, our services page covers the aerial filming work we take on in Jordan, including heavy-lift camera shots.